
The first thing to note is that the GUI and the corrupter are not the same. The corrupter is actually a command line tool named md_corrupter which was made before the GUI was planned. The GUI is designed to make it easy for people to use the command line corrupter since corrupting manually can be a pain. When you first open the program, md_corrupter.exe and update.exe will be extracted. The update program is what is used to update to a newer version when you check for updates.
Anyway, onto the program. The first thing you'll see when opening the program is something like this screen:
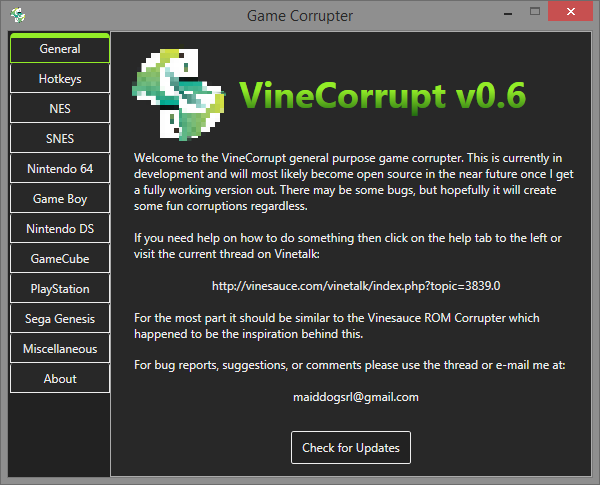
First off, the General tab has a button with the label "Check for Updates". This obviously checks for updates. When clicked, it will see if there is a newer version available by accessing version.json and if there is a newer version it will ask if you want to update. If you do, then it will run update.exe and close itself. The update process will download the corrupter, delete the old program, and place the newer version under the same directory as "Corrupter.exe". If for whatever reason the update fails after deleting your old version you can always attempt to retry by manually running update.exe.
On the left side of the window are tabs which will take you to different sections of the program. For now we will talk about the basic layout of console tabs. If you want specifics on consoles or hotkeys please visit those tabs. Now, each console tab is specifically designed to input the correct file type and send it to the command line corrupter with the correct arguments so you don't have to worry about doing it manually. There are two different types of game corruption tabs you will encounter: those that have a filesystem and those that don't.
Lets start with ones that don't have a filesystem. Examples of these are NES, SNES, N64, and all Game Boy consoles. The ROM files for these consoles are singular files which do not have any sort of files hidden inside them (except N64 sometimes, but that's too complicated for now). When you open up a tab of one of these consoles you'll see something like this:
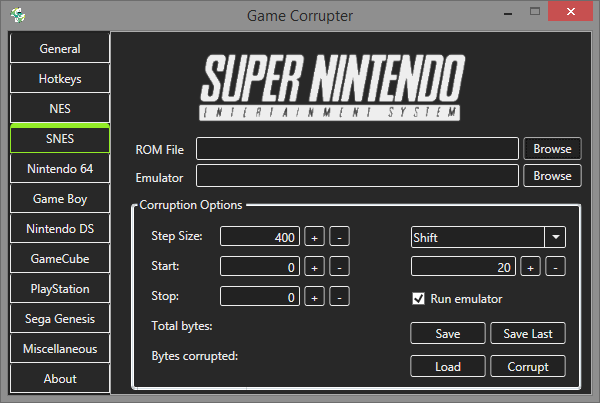
A lot of what you see here will be shared with tabs that have files as well. Note: All number values in the program are in hexadecimal. Here are what the different controls do:
- ROM File: Click Browse to find a ROM that matches the given console.
- Emulator: Click Browse to point to the emulator that runs the ROM files from the current tab. The emulator will be saved for next use, but may not be saved after an update.
- Step Size: The amount of spaces to skip between each corruption.
- Start: The offset into the ROM where the program will start corrupting.
- Stop: The offset into the ROM where the program will stop corrupting. A value of 0 means the end of the ROM.
- Total bytes: This will display the total bytes of the ROM in hexadecimal once you select a file.
- Bytes corrupted: This will display the total bytes corrupted with the current settings once you corrupt a ROM.
- Corruption Selection: The drop down box lists all the current corruption types. The currently selected one will be used once you press Corrupt.
- Corruption Value: The box under the drop down selection is the value to associate with the corruption type. View the Corruption Types tab to see how they work.
- Run emulator: If an emulator is selected, it will attempt to run the emulator with the given rom as an argument. If an emulator has already been run this way it will be closed. This will not work with all emulators.
- Save: Shows a display box with a code that can be loaded to restore the current settings.
- Load: Loads settings from a code generated from the Save button.
- Save Last: Once a ROM is corrupted, you can save it to a custom directory with this button. It will be deleted from the corrupter directory afterwards.
- Corrupt: Starts the corruption process with the current settings.
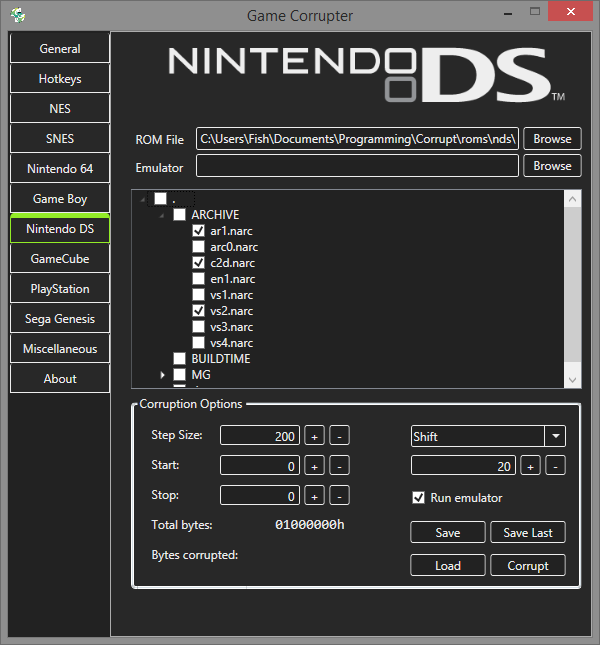
For systems that have files everything is exactly the same with an added file viewer. When you select a ROM or disc it will read the filesystem information and display the folder structure. From that, you can expand directories and check the files you want to corrupt. Here is what Super Mario 64 for Nintendo DS looks like:
Those are the basics of how the console tabs work. Please view the Corruption Types and Hotkeys tabs to learn more.
Currently there are 11 different corruption types you can choose from. Because the controls have limited space the names needed to describe what they do and be short at the same time. Because of this it may not be entirely obvious what they do. This document will help describe and show how the different corruption types work.
Shift grabs a byte a given distance away and puts it in the current position.
Example with Step value of 5 and Corruption value of 2.
Original: ABCDEFGHIJK
Pass 1: ABCDEFGHIJK
Pass 2: CBCDEFGHIJK
Final: CBCDEFIHIJK
Swap grabs the current byte and a byte a given distance away and swaps their values.
Example with Step value of 5 and Corruption value of 2.
Original: ABCDEFGHIJK
Pass 1: ABCDEFGHIJK
Pass 2: CBADEFGHIJK
Final: CBADEFIHGJK
Add adds a value to the current byte.
Example with Step value of 5 and Corruption value of 5. (Additions are of ascii values in this example)
Original: ABCDEFGHIJK
Pass 1: ABCDEFGHIJK
Pass 2: FBCDEFLHIJK
Final: FBCDEFLHIJK
Set to sets the value of the current byte to the value given.
Example with Step value of 5 and Corruption value of 65 (ASCII 'A').
Original: ABCDEFGHIJK
Pass 1: ABCDEFGHIJK
Pass 2: ABCDEFGHIJK
Final: ABCDEFAHIJK
Random generates a random value and places it at the current byte.
Example with Step value of 5. Random does not use the corruption value.
Original: ABCDEFGHIJK
Pass 1: ABCDEFGHIJK
Pass 2: JBCDEFGHIJK
Final: JBADEFQHIJK
Rotate performs a bitwise rotation of the current value.
Example with the current byte being 0x53 and Corruption value of 2.
Original: 0x53 or 01010011 in binary
Rotate Left: 01001101
Rotate Right: 11010100
ANDs the current byte with a value.
| A | B | Result |
| 0 | 0 | 0 |
| 0 | 1 | 0 |
| 1 | 0 | 0 |
| 1 | 1 | 1 |
Example with the current byte being 0x53 and Corruption value of 2.
Original: 0x53 or 01010011 in binary
Final: 00000010
ORs the current byte with a value.
| A | B | Result |
| 0 | 0 | 0 |
| 0 | 1 | 1 |
| 1 | 0 | 1 |
| 1 | 1 | 1 |
Example with the current byte being 0x53 and Corruption value of 4.
Original: 0x53 or 01010011 in binary
Final: 01010111
XORs the current byte with a value.
| A | B | Result |
| 0 | 0 | 0 |
| 0 | 1 | 1 |
| 1 | 0 | 1 |
| 1 | 1 | 0 |
Example with the current byte being 0x53 and Corruption value of 2.
Original: 0x53 or 01010011 in binary
Final: 01010001
Changes the current byte to its complement.
| A | Result |
| 0 | 1 |
| 1 | 0 |
Example with the current byte being 0x53. Complement does not need a value.
Original: 0x53 or 01010011 in binary
Final: 10101100
Hotkeys are key combinations that cause an action to occur. VineCorrupt has many hotkey types available that will allow you to do almost anything with keypresses instread of typing or mouse clicks. Hotkeys will only be caught on the GUI so you must have the window focused to be able to use them. Below is a list of hotkeys and what they do.
- Corrupt: Acts as though you pressed the Corrupt button
- Increase/Decrease Step: Increases or decreases the step value by 1.
- Increase/Decrease Value: Increases or decreases the corruption value by 1.
- Increase/Decrease Start: Increases or decreases the start value by 1.
- Increase/Decrease Stop: Increases or decreases the stop value by 1.
- Change type: Changes the current corruption type to the next in the list.
- Swap Sections: Changes the hotkeys from acting between the PRG and CHR sections in the NES tab.
Remember, you must click the Save Hotkeys button before changes will take effect!